Showing posts with label crafties. Show all posts

Monday, June 20, 2011

"Look mommy...  Look! I drewd dis batman jus for Keetza!"

Thursday, January 6, 2011

I'm dreaming of a felted Christmas....

I am SOOOO excited!!!  We hit the After-Christmas (75% off) section of target the other night... and along with getting various rollls of wrapping paper, for less than $1 EACH... I found these handsome felted snowman & snowman balls, for only 50¢ a piece!!! They were so adorable, I just couldn't help but snatch up every one I could find!!


Thursday, October 15, 2009

All Natural Play Clay

Marmee taught preschool for many, many years, and used to make homemade playdough for us, all the time! - I forgot how easy and fun it is! Plus with homemade... you no exactly what's in it No worries about funky ingredients or toxic colorings! So, if some ends up in your curious toddler’s mouth.... it's perfectly fine! (though the taste probably won’t be much to her liking)

The October 2009 issue* of Family Fun Magazine recently contained an excellent recipe for All Natural Play Clay. I especially like this one, because you don't have to have cream of tartar on hand. ... nor do you have to cook anything. And since there is no stove involved... children can be part of making it too!

The other part of the article, that really caught my attention, was the tips on coloring the dough, using common [natural] kitchen ingredients, such as cocoa powder, beet juice, paprika or turmeric! Hmm...I wonder what other colors we could figure out...? Perhaps, blueberry juice for purple... ??


*if you happen to own a copy of this magazine, the article can be found on page 18 of the issue.)


Ingredients
1 C flour
3/8 C salt
1 T vegetable oil
Natural Dye (see below for colors)
Directions
In a bowl, combine flour and salt. Pour in oil & natural dye and stir well. Knead dough for a few minutes. If clay is too soft, add a bit more flour. Store the clay in air tight containers in the refrigerator.
-----------------------------------------------------------------------------
Natural Dye:
Brown: 3/8 C plus 1 T hot water, 4 T cocoa powder
Fuchsia: 3/8 C hot beet juice
Orange: 3/8 C hot water & 1 T paprika
Yellow: 3/8 C hot water & 1 tsp. turmeric

  • Here’s a link to the online recipe. It’s almost the same as the magazine recipe, but the magazine recipe included a tablespoon of vegetable oil too... as well as those natural dyes I mentioned! :-)
  • In light of the season, this is one I definitely want to try... a recipe for Pumpkin Pie Play Dough... Mmm!!
  • Arm & Hammer even has a cool pdf where you can get ideas on how to use your play clay. Their version is slightly different but if you want a little longer lasting it would work too. Click HERE for that PDF

Monday, October 12, 2009

DIY Babylegs!!

A wonderful tutorial for DIY Babylegs!!! ~ PLUS Target has some really cute ladies' knee socks in stock, right now - a three pack for only $6-7!!! (they even have some in the right colors for little guys too!! :)


Now if only I had a sewing machine and weather cool enough that she could actually wear them... :)

Saturday, May 30, 2009

Toddler Crayon Addendum...

A brief addendum to my Toddler Crayons post...

Have you ever noticed how most cheap (dollar store, restaurant, promotional, etc) crayons never seem to color real well. You go to fill in the fun little color/game sheet... or doodle out the awesome [albeit primary colored] design, which had been so carefully procreating in that ingenious little mind of yours.... Only to be left with nothing but a [clear] waxy residue and a little bit of awry color... ? Mmmhmm... annoying.

Well, let's just say, those little buggers are not any better in Toddler crayons!

I figured, what harm could a few "low-class" ones do? After all, there aren't that many of them... and, I was mixing them with a majority of good crayons. (heh, right... famous last words). Honestly, I figured they would melt into the other ones... maybe leaving one or two lame spots... but otherwise, be no big deal at all. Sadly, I now see the fallacy in that logic. Upon baking and cooling our beautiful crayons.... I noticed the top of each one was lighter in color than the rest of the crayon. Come to find out... all that extra cheap wax, had risen to the top during baking.. resulting in nothing more than a clear layer of pure annoyance.

If you look closely at the bottom of the crayons in this picture,
you'll see the lighter layer of clear wax...


Here's what I did to fix to the situation....

Since I already had my toaster oven heated up (I was cooking a sweet potato for KB), and the top gets really hot... I lined small cookie sheet with aluminum foil, and rubbed the tops of the crayons to soften them.


Then I took the large holed side of an old grater and grated down the clear layer of each crayon...


Finished it with the fine side of the grater...


And then lightly rubbed it back on the heat, to smooth them out...


The result... a slightly less tall, but much more operable crayon!


Moral of this story...
Higher end
(ie Crayola) crayons work best for this project!!


Saturday, May 9, 2009

Toddler crayons...

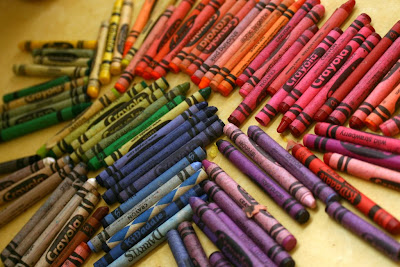
What does one do with a whole bag of old, unwanted, crayons... some that are perfectly good - just extremely illogical for small hands... and others that are broken and of no use to anyone??


Why, recycle them into toddler crayons, of course!!!

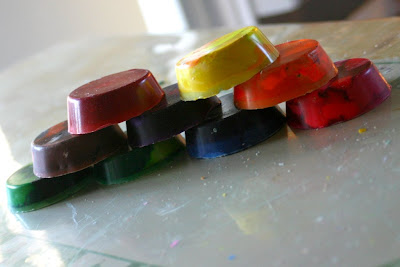
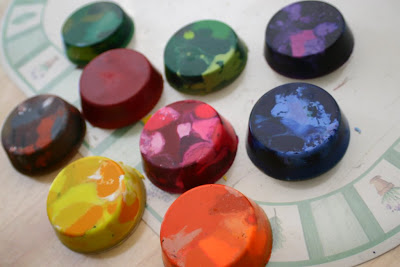
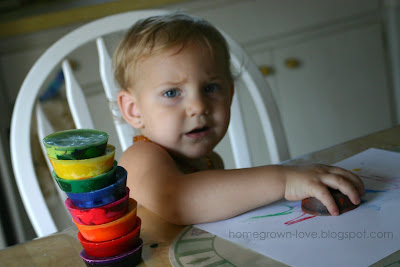
Like most families with toddlers... no matter what the child's temperament. you always end up with a bunch broken crayons.... Fact of life. Those thin, elongated little buggers, are just not designed for a toddlers chunky hands, or their beautiful, spontaneous spurts of swirling energy & creativity! So what's the solution? These beauties...


Here's how it works....
You’ll need:
  • Crayons - (you can purchase them cheaply at the back to school sales.... or just use ones you already have! - I would highly recommend using higher quality [Crayola] crayons though!!)
  • Muffin pan or candy molds (preferably one that you don’t mind getting a little crayon on! Also, some prefer mini muffin tins... I used a regular sized one.)
  • An oven
Preheat your oven to 250 degrees F.

Peel off all the paper from the crayons...

(for the new ones, I found it much quicker to remove the paper in one smooth motion if I carefully ran the exacto knife down the center of the paper and peeled the paper back -- for the old ones with stubborn wrappers, a minute or two soak under running hot water worked well.)
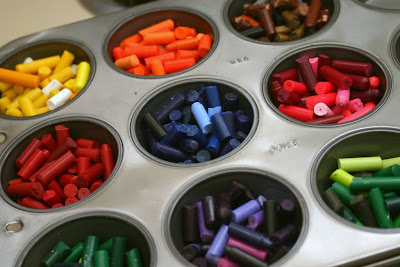
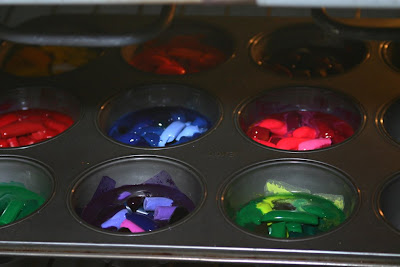
Break them into small pieces... & arrange them in each cup of the tin.
(I did like colors together, but multi-colored ones would be fun, as well!)

Bake just long enough to be melted, so you can’t distinguish the crayon shape anymore
(^These^ are not quite there yet!)
Turn off the stove...
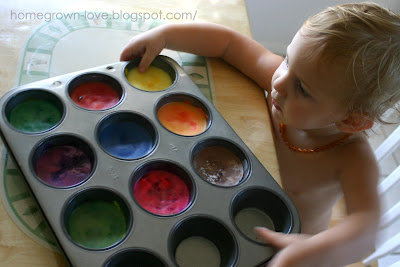
but leave them to sit & congeal a little, before moving the pan.

(**this is especially important if you are doing multi-colored crayons!! -- Failure to do so, will cause the colors to amalgamate... and you will end up with brown crayons!!!**)
Let them cool and solidify....
Pop them out of the tins....

(If you have trouble with this, you can put them in the freezer for a bit)
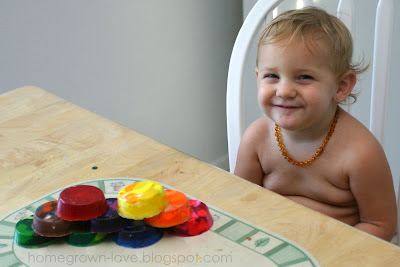
And Enjoy!


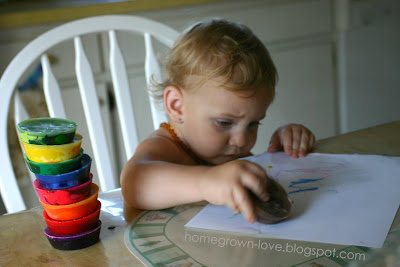
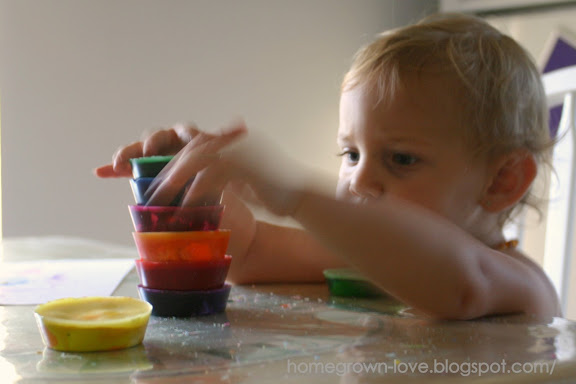
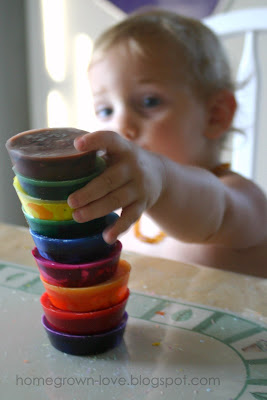
Apparently they make good stacking toys too! ;)


Did you have trouble with a clear layer of wax forming on the top of your crayons?
See my Addendum post, here.

Sunday, January 18, 2009

Sheepy Skirt Collection

Oh my... I think I am in LOVE!! I have seen and/or heard awesome things about Wool soakers... but I have never seen anything quite so adorable as these:


http://www.sheepytimeknits.com/knit/skirt.htm

That's right! They are skirted wool soakers! -
So they not only function as a cloth diaper cover... but also clothing!!

::whines:: I want some!!

(Great! Now I think I'm going to have to learn to knit!! heehee...)

Friday, January 16, 2009

Soft-soled Shoes (pattern!)

picture by Twenty Cent Mixture, for the cloth shoes for babies Flickr pool

We all have heard the recommendations, for babies and children to go barefoot for optimum foot development. However, going barefoot is not always convenient or even possible. SO... enter the soft-soled shoe! But if you've ever shopped for soft soled shoes, you'll know just how stinkin' expensive they can be. They can range anywhere between $10-$15 a pair (at Walmart, Target, etc) t0 $25-35 a pair, for brands such as: Zappos, Pediped, Robeez, and PlatyPaws (just to name a few...). But if you are at all tight... ahem, I mean frugal like I am (heehee).... then you too would have a hard time coughing up that kind of money for a single pair of shoes!! (heh, I don't even pay $30 for a pair of shoes for ME! lol!) So then what is the alternative, you ask? Why making them of course!!

The blog: http://stardustshoes.blogspot.com shares a link for what seems to be a simple pretty simple shoe pattern & tutorial for making these adorable foot accessories!! (In fact, the whole site is seems to be filled with crafty inspiration.... But the shoes.... Mmm... I could just eat them up - they are SO cute! )

So yes.... as soon as I get my sewing machine (which I am hoping will indeed be soon! - at least, it's my next "wish list" gadget!!), I definitely want to attempt to make a pair!! Hmm.... too ambitious?

Monday, November 3, 2008

Our Weekend Project...

Yes - though it's on a much lighter note than my last entry - this is yet another politically related post. -- Don't worry, it will all be over soon and then we can get back to our regularly scheduled programming... whatever that may be! lol!


As I mentioned before, in a few previous posts... we've been having trouble with people vandalizing and/or stealing our campaign signs. Matter of fact, right after I wrote the last one, we left to go out to lunch/ get KB's new shoes... and we noticed that our two newest McCain/Palin signs had been ripped right off their metal stakes & stolen... >:(


So just like last time... we set out to replace the origial one(s) + add one extra. Unfortunately, being that we're not the only ones with this problem, the headquarters was all out of signs! Since B has been wanted one of the big signs anyway, we decided to shift to plan B, and make one... one that is BIG.... and one that is bold! It's was long process.. but a lot of fun!

Here's some pix of process & results...

The materials...


Getting it cleaned up...


Spray painting it blue...


Projecting the design (specifically designed for the dimensions of the board)...


So it could be traced it on, for easier painting....


Painting in the design... (B did all the bigger lettering... I did the tiny stuff.)


Putting it up...


The Finished product...


Think that'll get the point across??

(note: we had some shots that were better than the ones portrayed here... but they accidentally got erased from the computer... :sad:)